Unlike the pros, who play and lose all the time, when real friends play an RTS it’s difficult to get over a ram push that destroys your town in the first 10 minutes (believe me I know!). It can ruin friendships! The 2v2 format means you can always blame the other player! And since there are no real teams you can transfer that blame to the next guy at the next game! No accountability!
Format
4 people compete and play a total of 4 games. Each game is 2v2. The first three games have mixed teams where each player teams up with every other player. The last game is a “tie breaker” that determines the real winner. The players with the most wins play on opposite teams. If there are ties for who has the most wins an argument over it will ensue and the rules will be written down for next time.
One of my favorite pastimes is to watch Youtube about 3D printers. At some point you get tired of reviews (especially if you have one and don’t want to lust over yet another one!) so you move onto prints and creators. One of my favorite creators is “3D Printy”. His designs are amazing and his videos are entertaining and tell you everything you need to know about the design and what you are getting into. Previously I had printed a “lockbox Pumpkin” and it was fun but took FOREVER to print so I only ever made two.
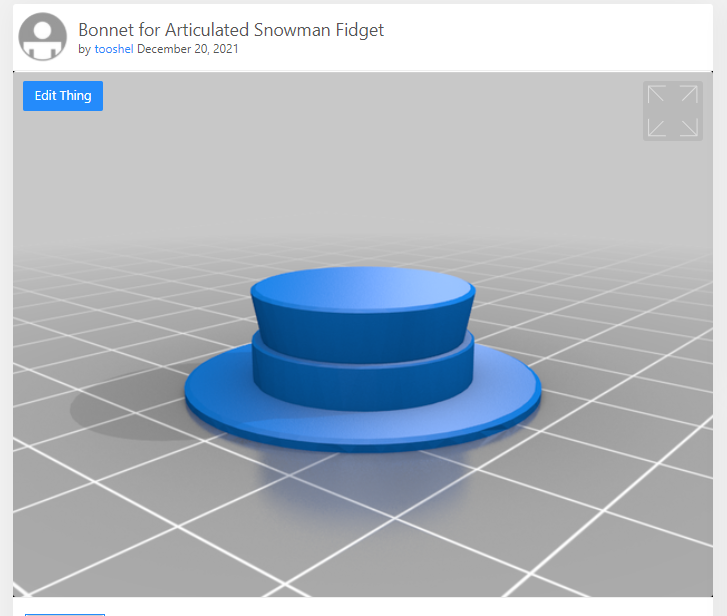
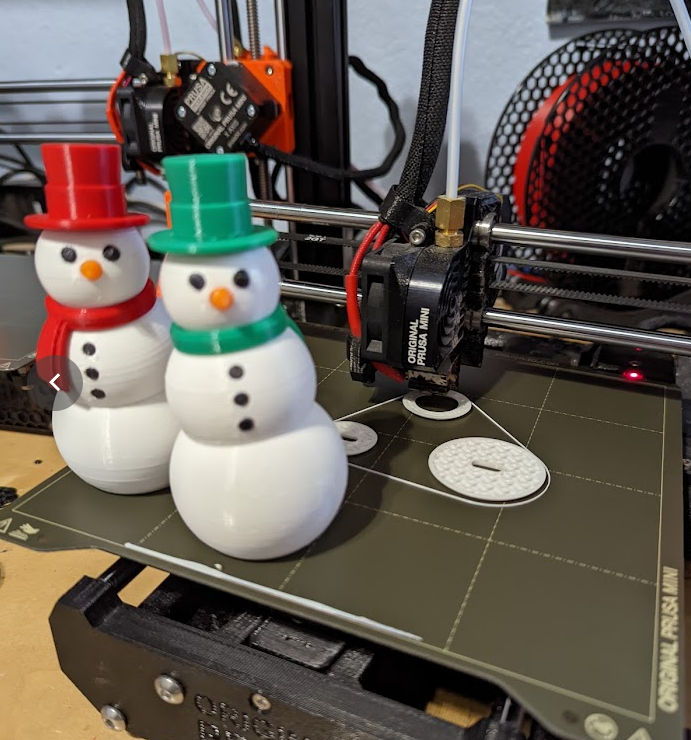
Recently he published a video about “3D Printed Snowman Fidget Toy” and it was fantastic as usual. I printed a few and the family thought the snowman was cute and wanted more. At first I just used Christmas colors, red and green, to make the hats and scarf. But then we (as in the family and I) wondered what a teal or pink one would look like. And then something wasn’t quite right . . . this is a snow “man” but what would a snow woman look like? I did a quick google search and it seemed the only real difference was the hat! So I got the hat STL, put it in TinkerCAD and shrunk it down and made the brim a bit wider. TADA! The bonnet was born. I posted my “makes” to Thingiverse and Prusa Printers and posted a picture on Thangs (since they don’t have makes). 3D Printy liked it and suggested I make a remix so I posted that too on Thingiverse and Prusa Printers (not on Thangs because makes and remixes are not a “thang” there).
My remix on Thingiverse
I know that gender and identity are sensitive issues and I don’t mean to suggest that one hat or the other has to go with one gender or the other. I happen to think that biology is complicated and gender isn’t binary in the way we have traditionally treated it. So wear whatever hat you want in whatever color you want! We have all combinations! 🙂
New Tricks
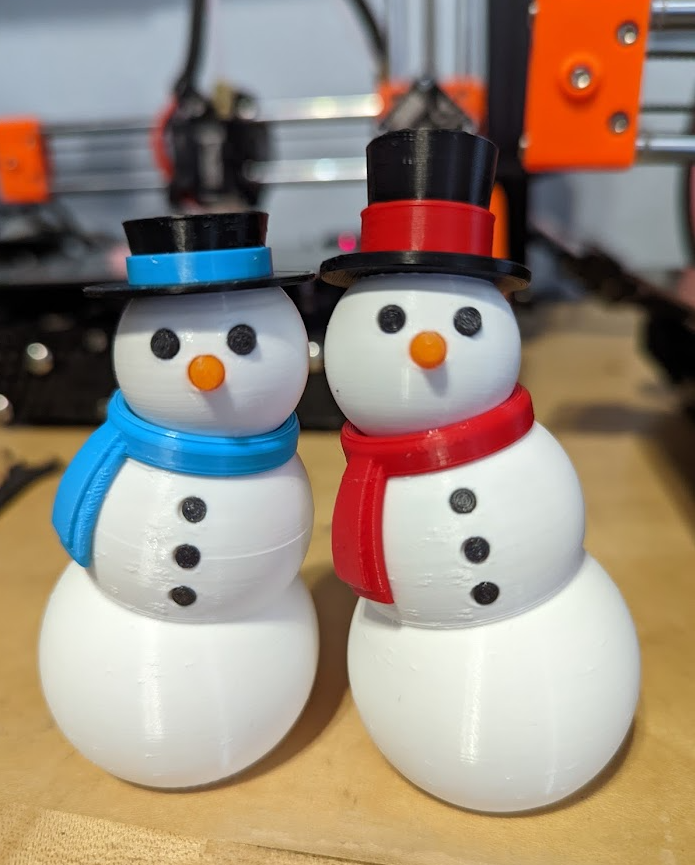
I also thought it would be cool to try out switching the filament and printing the stripe on the hat in a different color. Generally speaking switching the filament is the 2rd worst thing there is about 3D printing (after fixing them when they break) and is one of the more difficult tasks to do. (Scraping the print off the bed used to be the most difficult followed by leveling but that’s gone away thanks to magnetic beds and auto leveling systems.) On the Prusa Mini along with Prusa Slicer it’s SOOO EASY to switch colors in the middle of a print I wish I would have tried earlier. Now I have a new 3D printing tool for when I think up designs.
And I get it . . . it’s not THAT difficult to change the filament even on other printers but it’s almost always when I end up having problems with my printers so I still avoid it and want to just keep printing the same thing till the filament is gone!
Making them Gifts! And the pictures!
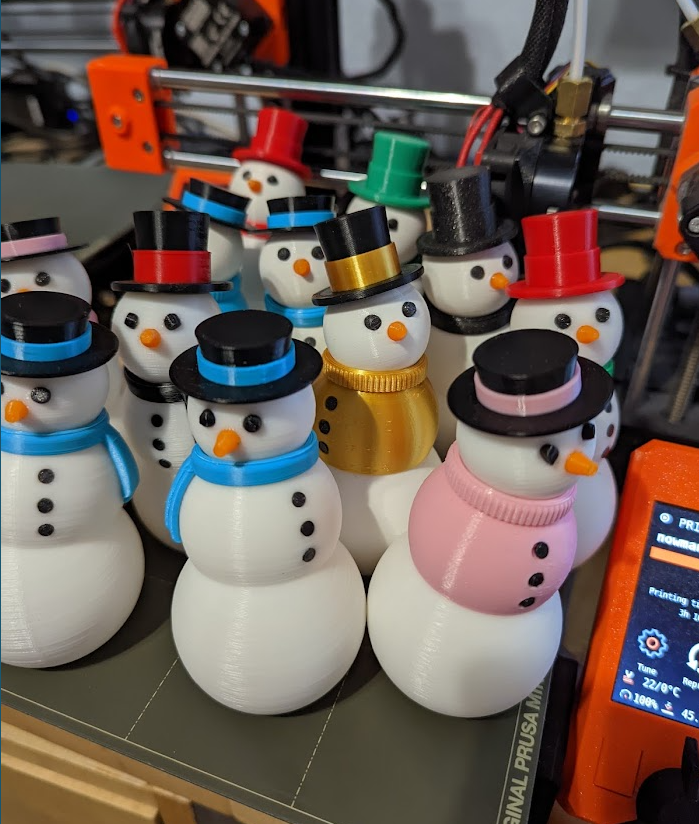
The family loved them so much that we decided to give them out as gifts to some of the teachers and staff at Patterson Elementary. I wish we had time to make one for every teacher there! They most certainly deserve it. Here are all the ones we gave away.
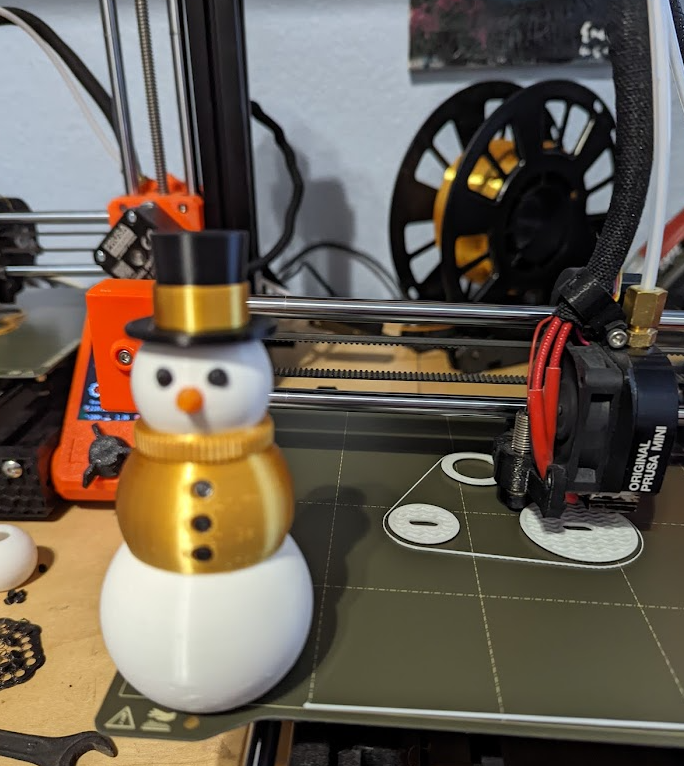
Gifts for peeps at PattersonBonnet and Hat example printsGolden Boy! We gave this to the principle of the school.The first versions before I figured out how to stop the printer and change filament. Still look cool on account of being Christmas colors.
For the last several years* Heatsync Labs has held an event called HAXMAS where card holding members keep the lab open for at least 48 hours straight. The idea here is that with the lab open you have time to MAKE the best Christmas gifts ever! Luis is the organizer of the event and takes on more than his share of hours at the lab and fills in any holes in the schedule. Generally I stay out of it on account of holiday season being busy. Between normal family stuff plus work stuff like trying to get this or that project either done or fixed and stable so that the team isn’t working over the holiday there just isn’t room for spending a weekend at the lab.
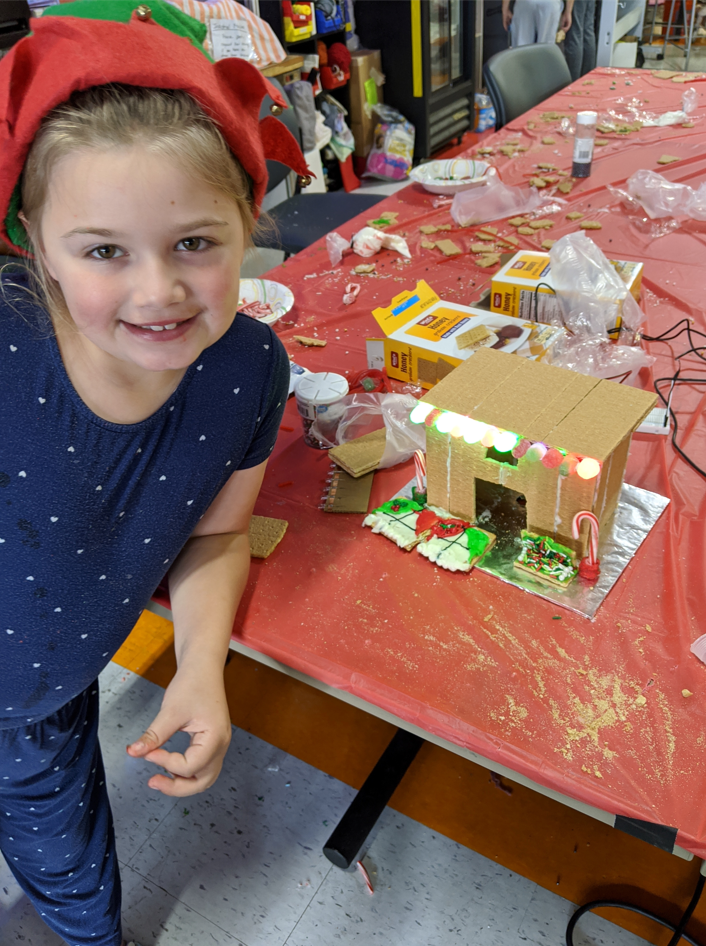
But this year was different! I asked my 9 year old daughter if she wanted to build LED Graham Cracker houses and spend the night at Heatsync and she said YES without even thinking about it! Normally I would have to try and convince her!
*Covid ruined every streak
TLDR Version
I ended up working on 3 projects!
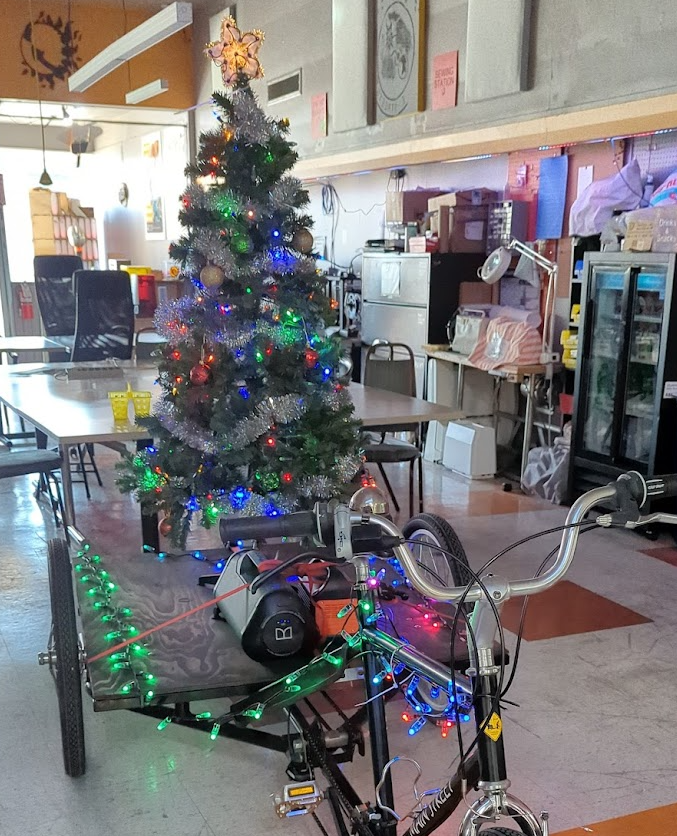
Light up Luis’s bike for the Bike Mesa event (WLED on a couple of ESP32 boards, 4 strands of 50 of my favorite LED lights, a Jackery, and a big Bluetooth speaker and BOOM!). Status: complete and a success!
Christmas tree on a bike!
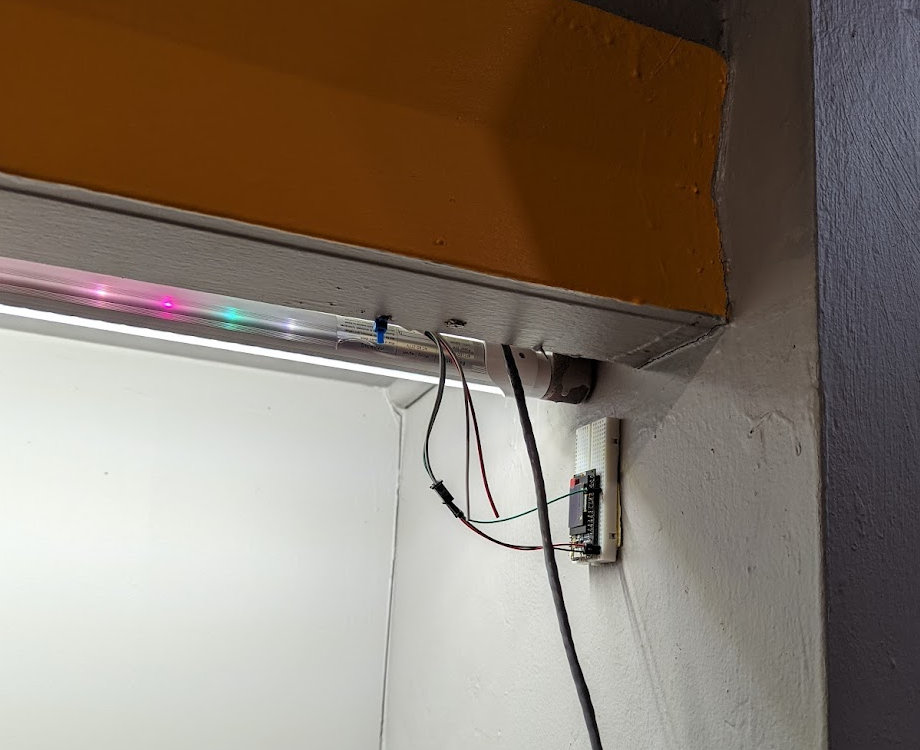
Replace the Arduino boards with ESP32 WLED for the LED strips in the Lab. Status: Need to get power injection working properly and needed more power. Plus, you can barely see the lights, maybe need to move them?
The new ESP32 mounted to the wall.
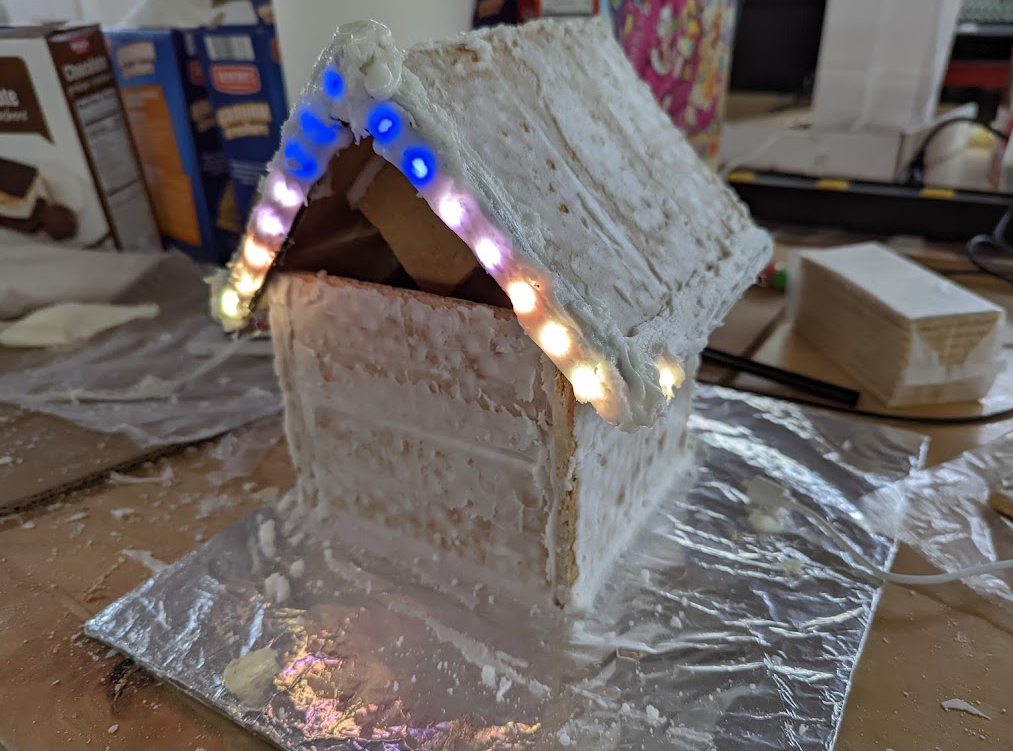
WLED controlled Graham Cracker house. Status: It works! But more decorations needed!
LES working!
PLUS! While were were there we saw an amazing community come together to support makers. There were many tours of the space and we entertained several people with Milton’s “mouse trap in a box” where you are invited to insert a quarter into a box and that would set off a mouse trap that would explode the box. Even when people knew it was coming they were surprised! They were also handing out laser cut wooden ornaments that could be decorated using paint or markers. How thoughtful! I wish we would have done more of that sort of thing.
Lighting up the Bike
On the FIRST FRIDAY OF HAXMAS I was planning on stopping by just to visit Luis and maybe work on some LED project. He told me about his plan with the bike via Twitter DM’s and I told him I have the solution to all his problems! The only issue was that I was going to ride my bike over and OH YEAH, also I have Dexter. He came to pick us up and thank goodness because we took a ton of stuff. The Bluetooth boom box, the Jackery 300, several bins of LED lights, another bin with tools and another with esp32 boards and other parts.
Then off to his house to get the GIGANTIC bike and the Christmas tree.
Once we finally got the the lab it didn’t take long to figure out what we wanted to do. We had to make sure the Jackery would last through the night (5+ hours) so we did some quick math based on the power consumption we saw on front of the Jackery. Even with 4 sets of 50 LED’s, plus the ESP32s, the power consumption was such that the Jackery would last 24 hours. So we added the incandescent star to the tree as well as the LEDs and our calculations told us it would still last way more than the 5 hours we needed.
The best part was when we were on a test drive and I played “Boney M – Mary’s boy child” on the way back to the lab and people were cheering. Here is it playing outside the lab!
Please don’t sue me Boney M!
ESP32 Controls for the existing light strips in the lab
Luis had an old Arduino board playing a “rainbow” but I thought it would be cool to put up a sign and URL and tell people they could control them from their phone on the Heatsync wifi. I replaced the boards but unfortunately there are a few issues:
The power injection that was there was not working. One of the power supplies was missing (which I knew about and brought a backup) but the other one was bad and was causing the lights to flicker. On the other side, the power injection is so far away that it won’t power the board so I need to get power to the board and to do that I need a power extension cable.
You can’t even see the LEDs! Even with the lights out they don’t make much of an impression. For a future project I want to move them to a more visible area and maybe add some diffusers.
Status: Still needs work! But if you are on the wireless at Heatsync and are lucky, you can go to http://wled-east.local and/or http://wled-west.local and control the lights!
ESP32 enhanced LES Graham Cracker House
In the past we would participate in Eric’s “LEG Graham Cracker House” event. This is a picture from 2019.
And one year we even ran our own LEG Graham Cracker event for free for the GDG community sponsored by Google. We knew how to build our own. And, well, Eric created instructions so that anyone can build one! But we wanted to do a bit more!
Eric was running it again this year but we held off registering because we figured we would give others a chance to sign up. Sure enough it was sold out. But Eric was generous enough to leave the supplies at the lab so that other people could build their own.
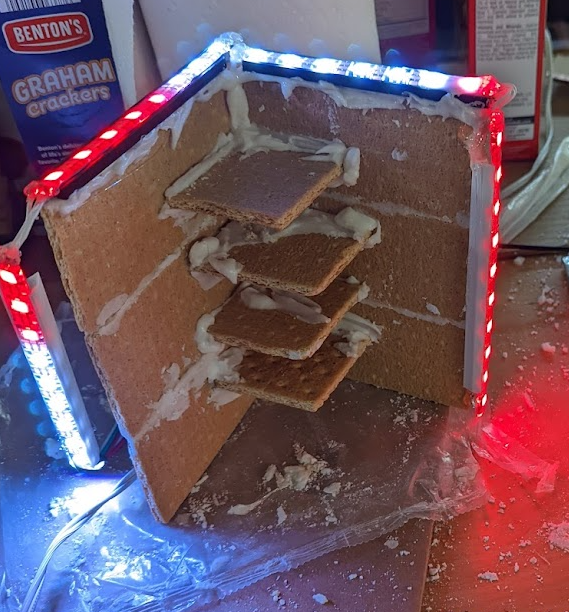
The nice thing about having that many hours is there is no rush. I could use the frosting to glue 3 crackers together and let it sit for 30 minutes, no problem. I was even able to make the roof freestanding and completely held together with nothing but foodstuffs (usually I have to cheat and use cardboard).
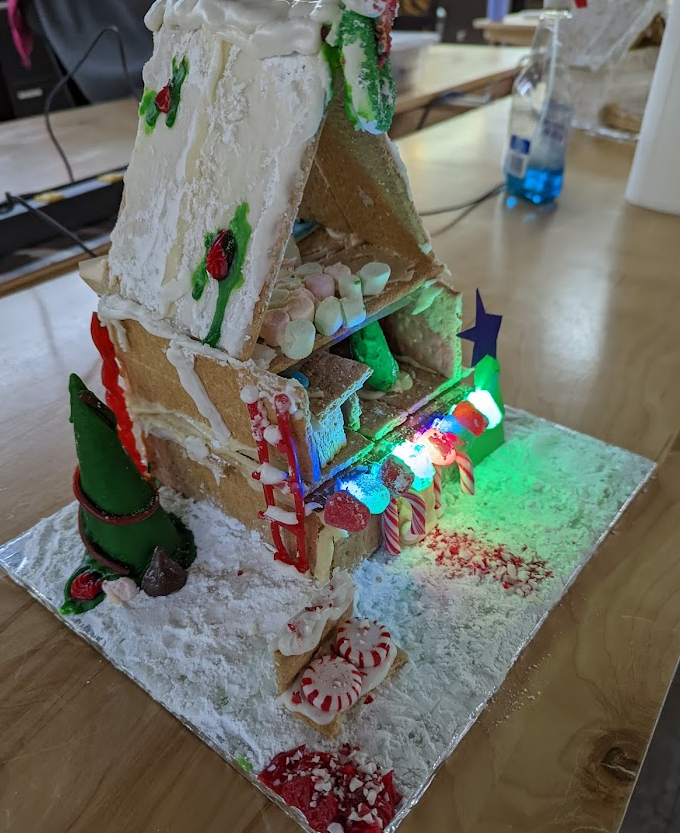
Here is the result!
Yes, it needs more decorations! And I had to stop and let it dry since the LES strips (Light Emitting Sugar TM) were still fragile. But generally it was a success!
The most difficult part was soldiering the strips together. For each section I cut the strip along the solder points but since I got the IP68 version, the plastic coating was difficult to remove. I used this “silicon sheathed wire” that was very flexible and I also used hot glue on the ends to keep them in place.
The roof as I was gluing it together and before frosting the LEDs
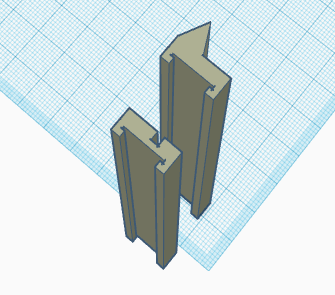
To keep the strip of LEDs lined up, I 3D printed some rails I made in TinkerCAD. This made them much easier to “sugar glue” them to the roof. The one with the triangle shape was for the roof “gutters” and the other parts were for the roof slopes that attached to the edge of the cracker.
My assessment is that this all needs to be refined alot more before we can unleash it on the public and do a class. But I bet Eric already has ideas for how we can do this better so hopefully he reads this and we chat more!
Conclusion
The entire weekend was SO FUN. Even though Embrie and I were tired and slept past noon on Sunday we had a really good time.
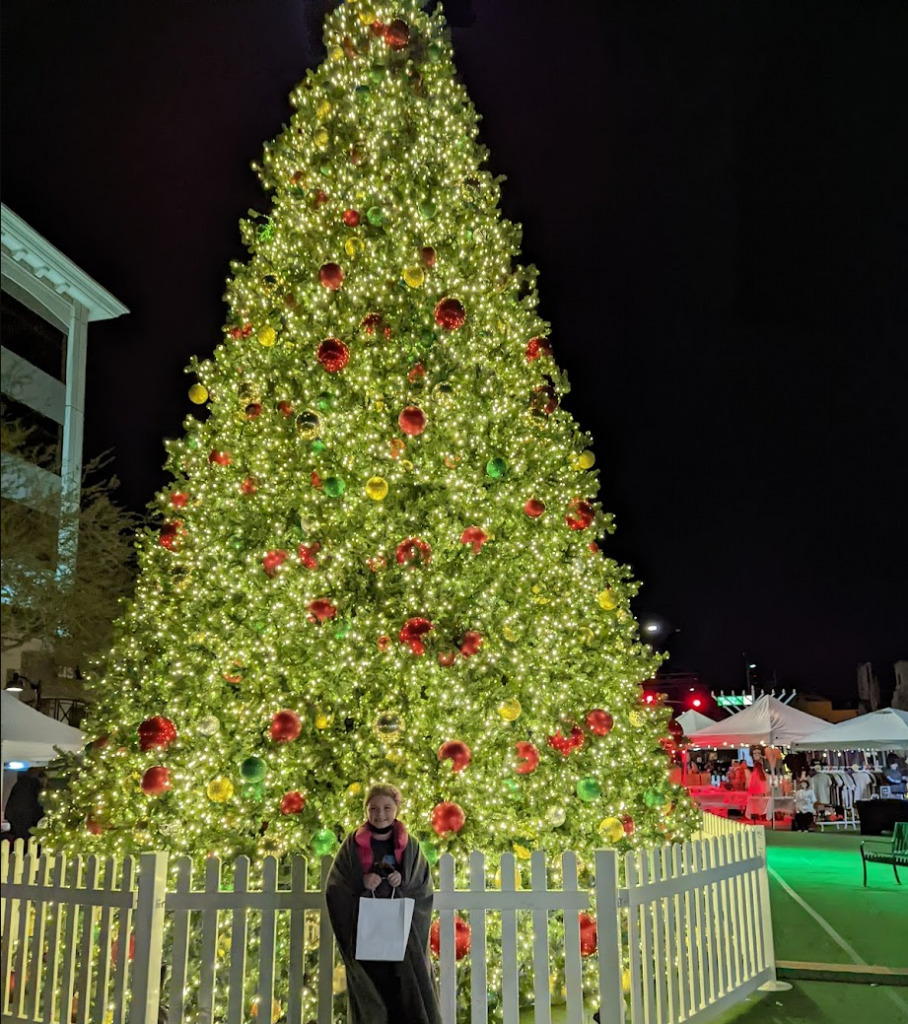
Mesa was full of excitement and had an event going on right next door with several makers and food vendors and a big Christmas Tree! Before we got too serious about hour LES house we spent an hour or so out there talking to people and just walking around outside. It was nice for us to get the chance to spend that time together.
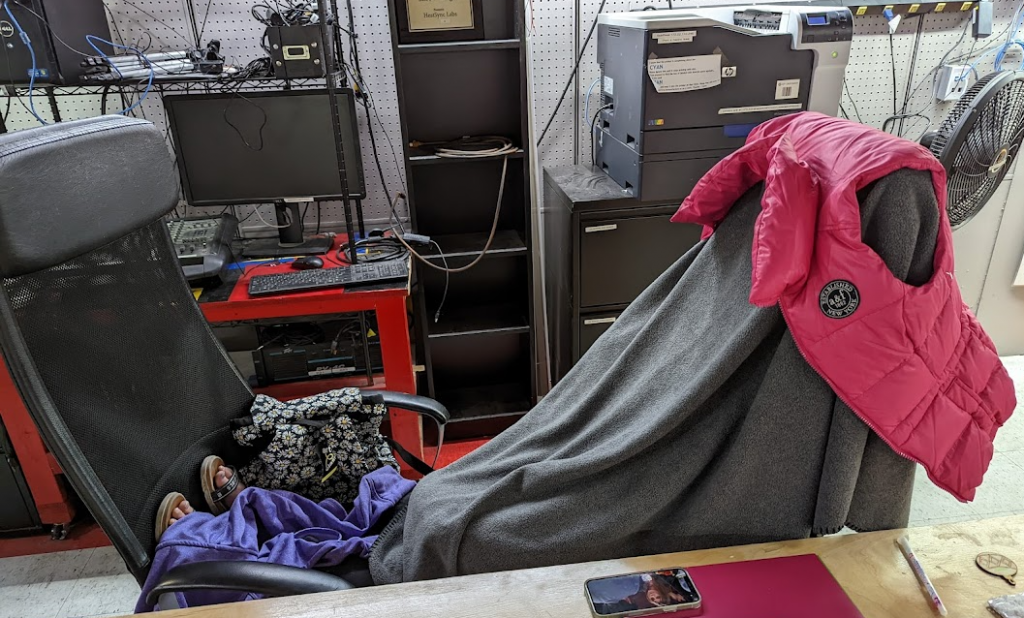
And she was such a trooper! She never complained, kept herself busy and even when her house was falling over and she had to rebuild she did it all without complaining. And at about 3:30 or 4am she quietly put the blanket over her chair and made a sort of “chair tent” and fell asleep. I took this at 3:57am and I don’t even know how long she was like that. Merry HAXMAS!
Sleeping in her Chair TentThe traditionally LEG house she made with no help. This is the second one, the first one fell apart.
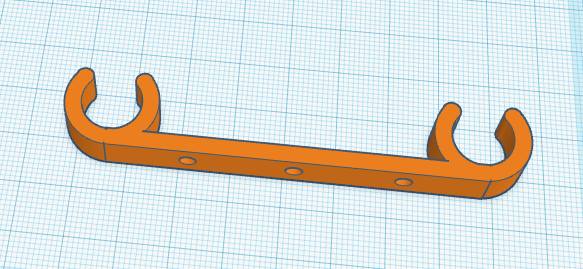
You might remember the _o_ to o___o conversation from the last blog post. You don’t? Maybe you should work on your reading comprehension (or maybe I should be a better writer . . . there is plenty of blame to go around). ANYWAY, we had another install! At Jim’s house! And this was the first test of a 100% install of the new o___o clips. In the blog post I noted that I made them smaller, only 8mm tall, and that was so the 10mm clips could go across them. I ran a few tests on that 2×6 board from the last post and it worked great! But when we got to Jim’s house I noticed right away it was going to be more difficult and that was because his roof eves were far more slanted back toward the house than mine. And sure enough it was tough fitting the stapler or even the drill back there. It was SUPER frustrating trying to staple and it was especially frustrating when you were on a wobbly 15 foot ladder.
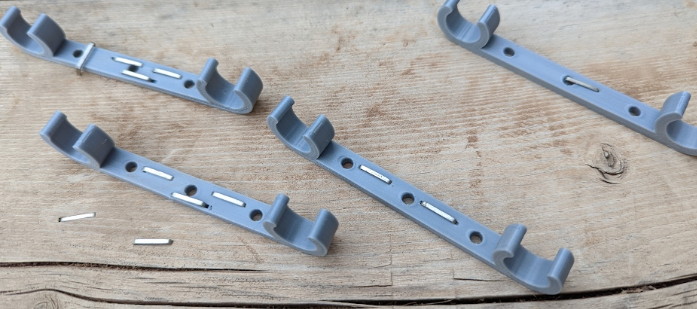
Jim rattled off a thousand ideas and MOST of them were terrible. But then he had the idea to just combine two of the clips and next thing you know he is trying to trademark the “JimClip”. Hours and hours hearing about the JimClip. But once he was doing that he was able to staple them way easier and with far fewer potty words (not ZERO bad words, just less). Trouble is he was going though them pretty quick and we were going to need even more! Thus I made a minor tweak to the design where instead of 8mm tall, I made them 12mm tall. And I took out the screw holes since that’s where they would break if the staple got too close. BOOM FIXED! Except that I also thought of one more change . . . .
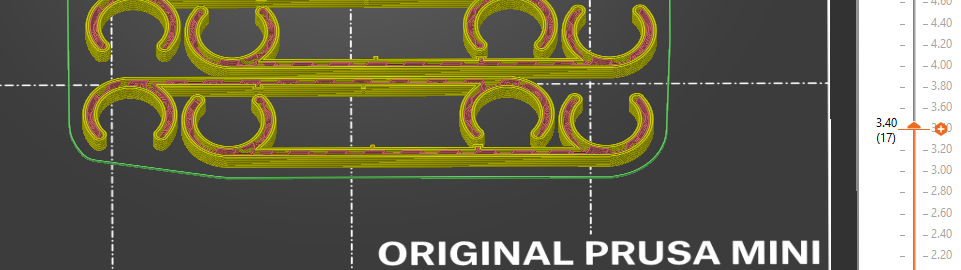
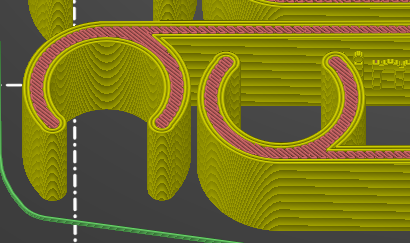
Instead of the default printer settings I decided to change the number of perimeters.
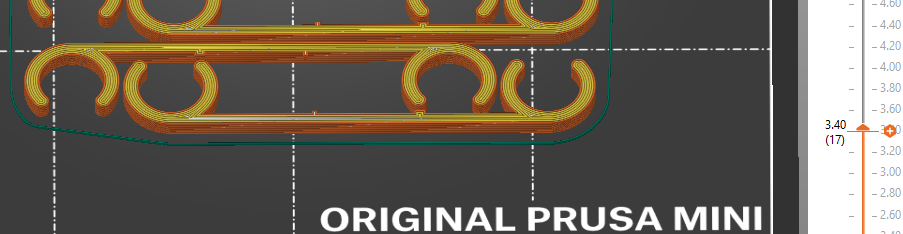
You can see the effect of the change here:
Layer 3.4 with default 2 perimetersLayer 3.4 after change to 4 perimeters
As you can see, in one case there is infil being used and in the other, it’s basically printed solid. So far the big advantage of that change is that the C is more difficult to break and the long center stands up well too. In my testing I could flex the hollow 2 perimeter print and break it easily (usually at the holes) but I wasn’t able to break the 4 perimeter version unless I went insane with it. I haven’t tried to staple it yet since I don’t have the stapler (left it with Jim) but I suspect they will staple just fine.
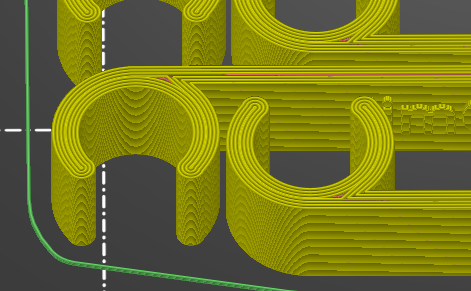
You can also see how different the top layer prints too! These are SO MUCH STRONGER.
Top Layer with 2 perimetersTop Layer with 4 perimeters
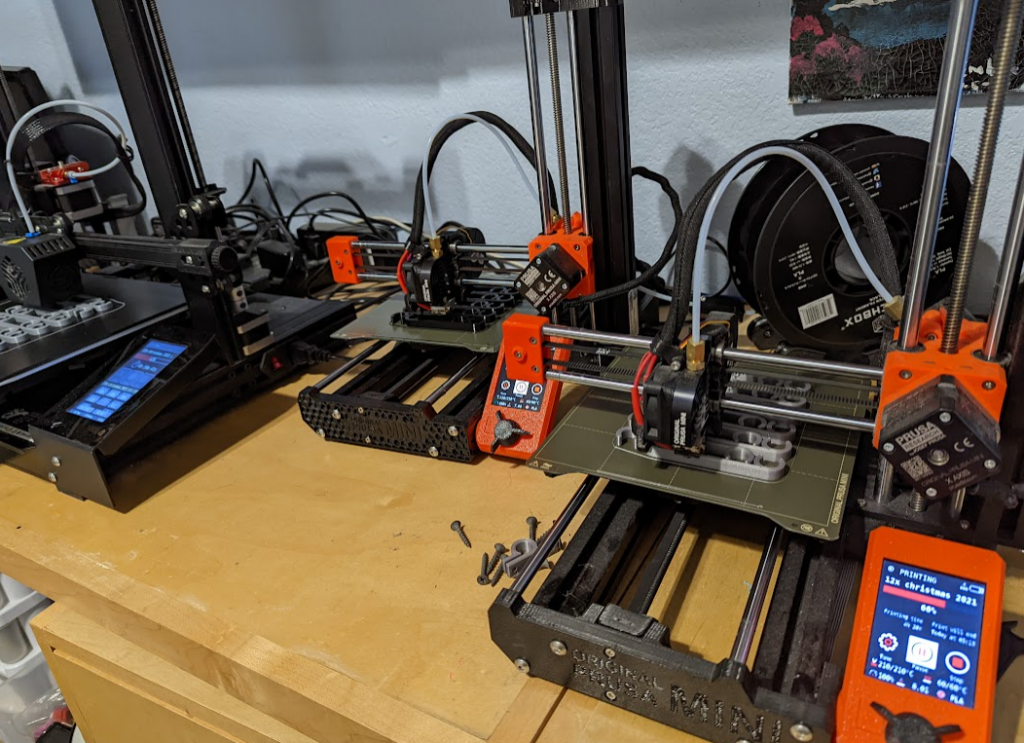
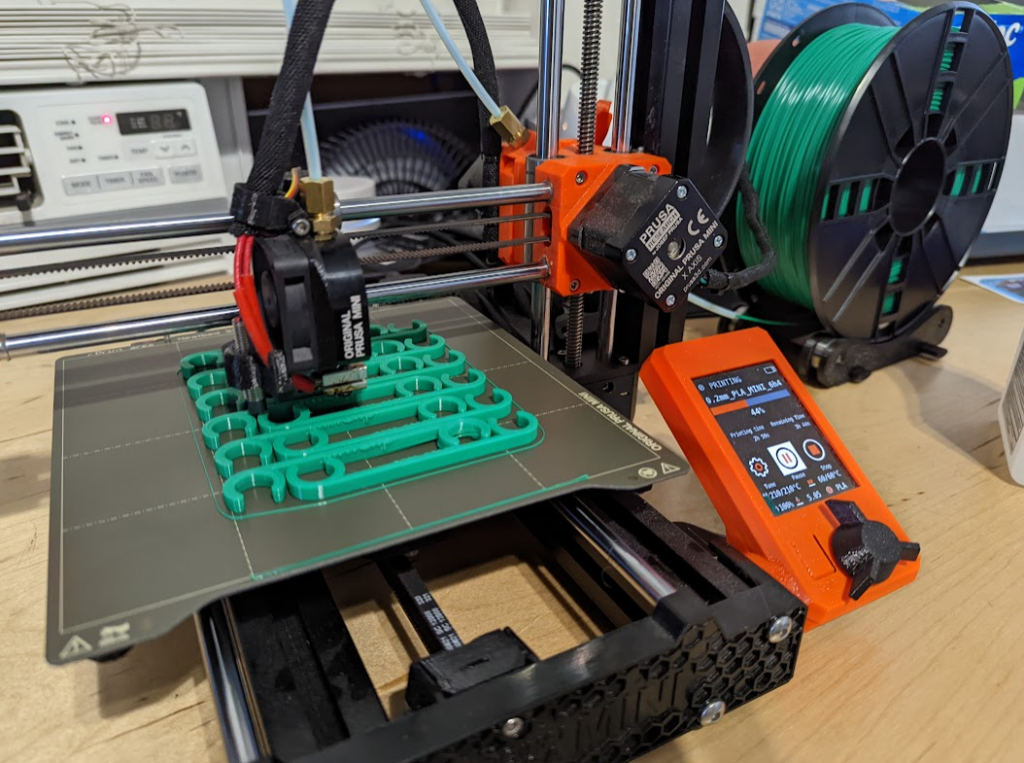
Of course, there is always a tradeoff. In this case, to print 12 the print time goes from 5 hours and 45 minutes to 6 hours and 42 minutes . . . about an hour longer. To compensate, I fixed another printer! Now we have 4 printers going!
3 printers
Plus one more!
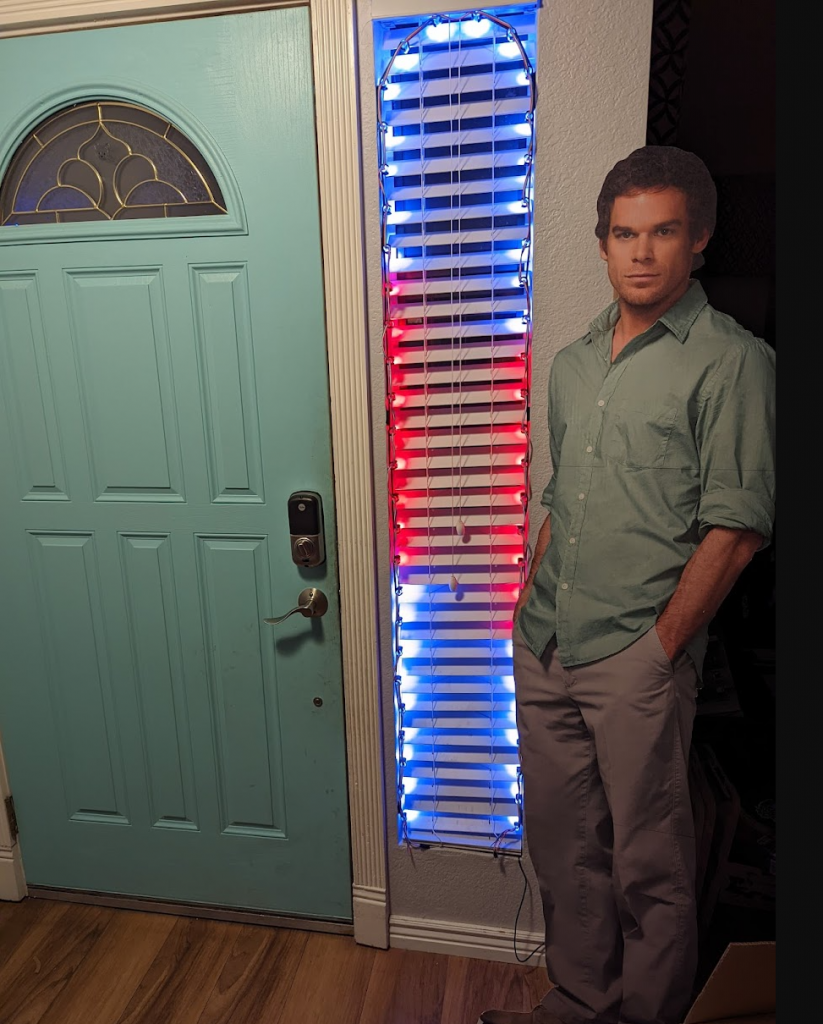
I also put this . . .
. . . idea to good use . . . check out the lighting in our front door window!
Dexter is there for scale. Also the door helps with scale.
That was super easy to do and it’s attached with just a few tiny pieces of velcro (which acts as thicker double sided tape) in strategic places.
WOW! It’s been a long time. My last job kept me too busy to blog and I had another kid and my . . . . okay those are all excuses. But after all this time I do miss it! So I finally had a reason to write and kept thinking I need to 1) move to https! 2) refresh the theme 3) something else . . . and those mind games kept me from writing too. I still need to do all that other stuff but I found a way to move past it. 🙂 DONE! Welcome to the new host and the 2021 WP theme! 🙂
I’ve been into Neopixel LED’s since . . . well, whenever Adafruit released that library and changed everything. Was it Adafruit? Okay, the details are fuzzy now. But when I first hooked up a strip of LED’s to a microcontroller it was really easy thanks to that library. And it came with all kinds of cool examples! I loved the rainbow example and played around with it till it was a pattern I liked, wrote that to the firmware . . . and then that was it! Whenever I wanted LEDs I had a way to make a rainbow of 50 LEDs I could just plug my microcontroller into a usb power bank and I had a nice little rainbow of colors. Seemed impressive at the time.
2017-2018 era
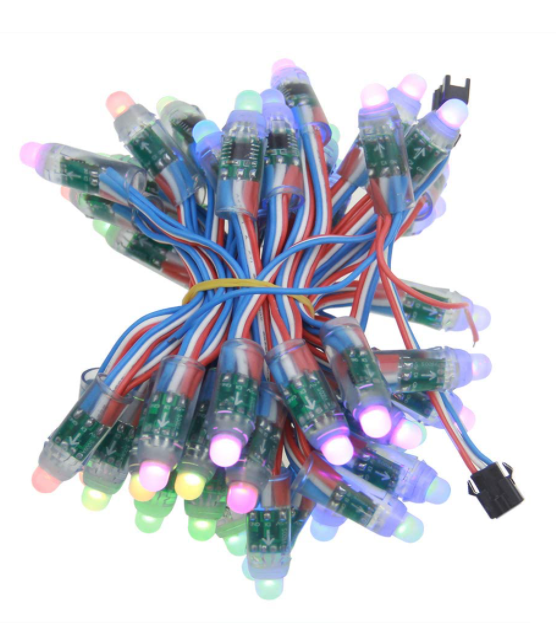
People have dreams of LED’s in their house behind the TV and under cabinets and the core issue is always the same . . . how do you hide the wires and the control box? I’m still not good at that. But you know what project DOES NOT require you to hide the wires and control box? That’s right! Christmas lights!
So back in 2017 or 2018, I bought these christmas lights from Amazon and strung them up the same way I have other Christmas lights up but this time I made a cool Christmas pattern and wrote that to the controller. I needed to inject power (anything more than 50 on a string is too much for the USB power let alone the tiny jumper wire I was using) so I used this power block that seemed water resistant enough I could just mount it under my roof. I put it half way though the strip to provide enough voltage to both size and DONE! Best Christmas lights ever! Except that the neighbor bought a set from Costco and his had a remote and like 10 patterns. FAIL!
2021 Goals
My wife has always wanted lights that were perfectly aligned instead of the droopy look you normally see in Christmas lights. And I always wanted to expand my firmware so that I could make a simple way to choose between, say, 11 patterns (no idea why 11, just had to be more!).
So, I had 2 goals
Find a way to mount to the roof so the lights are all lined up
More patterns!
I already had all the electronics (endless microcontrollers plus those LED’s from above) I needed from those past years but as usual, the mounting is what stumped me. I started to look online for what the “crazy Christmas lights” people do and there is all kinds of solutions: a) using PVC and drilling holes in them this size of the lights b) using the flat LED strips that are IP68 water rated and putting them in an aluminum channel with a diffuser c) this “Dr Zzs” guy that designed an aluminum “gutter” that has holes for the exact kind of LEDs I had already d) a professional with professional prices. I looked at the video from Dr Zzs and thought about going that route but I didn’t know how I would mount them to my wooden eves, working with metal gutters like that seemed like a nightmare, and, well, they were out of stock anyway.
The Software (WLED)
While I was on the journey to find a way to mount the LEDs I discovered the amazing WLED project. It seemed to be everything I ever wanted AND it had over 100 patterns many of which could be combined with your own set of colors. BOOM! So one morning I tried it out and was setup in with a string of lights controlled over wifi in an hour or two. The first 90 minutes of that was failing to see the Web Serial based “easy install” method and instead trying to figure out why the “pip install” method was not working. Don’t get me started. I just used a LOLIN32 board I had here from years ago which isn’t even listed as a supported board.
WLED is just SO GOOD and I’m just getting started with it. It can be controlled directly over wifi, using an app, or using a bunch of other methods. I quit playing around with it so I could focus on mounting the LEDs but suffice to say my family is going to have so much fun playing around with all the options.
Later I found out it was easy to automate them via a simple schedule so even that part is done (my LED’s from 2017-2018 stayed on all day).
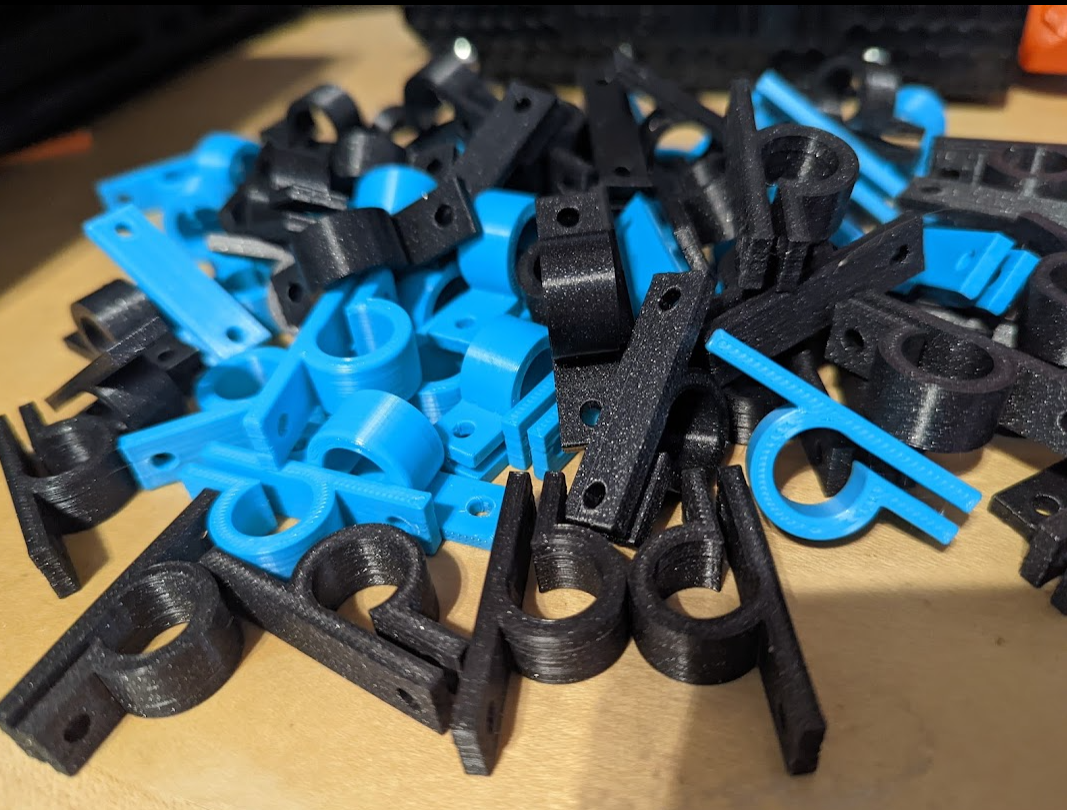
The Clips!
My other hobby has been 3D printing (more blogs about that soon hopefully!). It occurred to me that this was the perfect use case! In fact, I had been thinking about that for a long time and was thinking about making these sorta “blocks” that would house the wires and most of the LED itself to protect it from the sun (I live in Phoenix, AZ and we don’t have freezing or rain or snow to worry about). The problem with the “block” idea was that the time to print all the blocks PLUS the cost of filament meant I would spend more on that than the LED’s themselves. And as mentioned above, there were cheaper solutions even if you went custom. So then I considered wood and just drilling holes, painting it the same color as my eves, and then mounting that. But then I saw the cost of wood! Plus the wood is never straight and neither is the roofline!
Then, thanks to another project I thought about what could I print hundreds of that would be really quick to print. And something that is about 10mm high and has a 10×5 I could print 20 at a time. So then the clip idea was born! It all seems so simple and obvious NOW but at the time it was a revaluation for me.
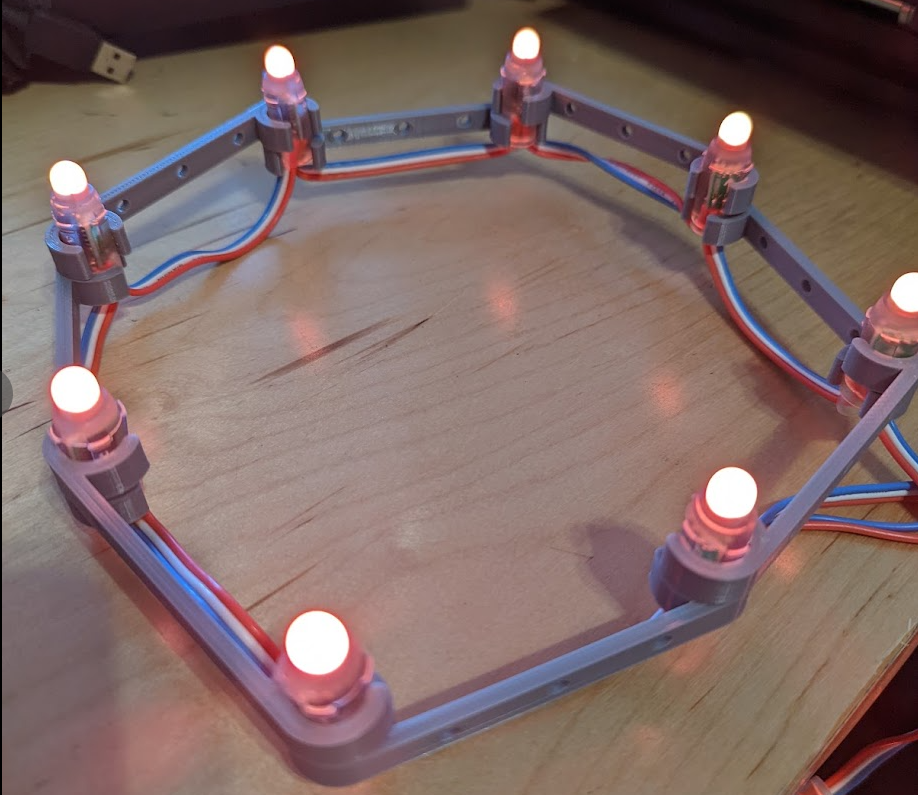
After about an hour, I came up with this
The idea here is I wanted something I could clamp onto the LED to hold it in place and something that would be fixed in two places so it wouldn’t swing at an angle when the wire was pulled (like a coax cable holder would). I printed a few prototypes to get the sizing right but soon I was printing 20 at a time. I really should have used PETG instead of PLA but a) PLA was already loaded in the machines, b) people say PLA is good enough for 95% of projects! how could I know it wasn’t good enough if I didn’t try? c) almost every time I have had issues with my printers it was when I switched out the filament type. It’s almost December! I gotta get going! Anyway, the next day, I had a nice pile to try out.
Mounting
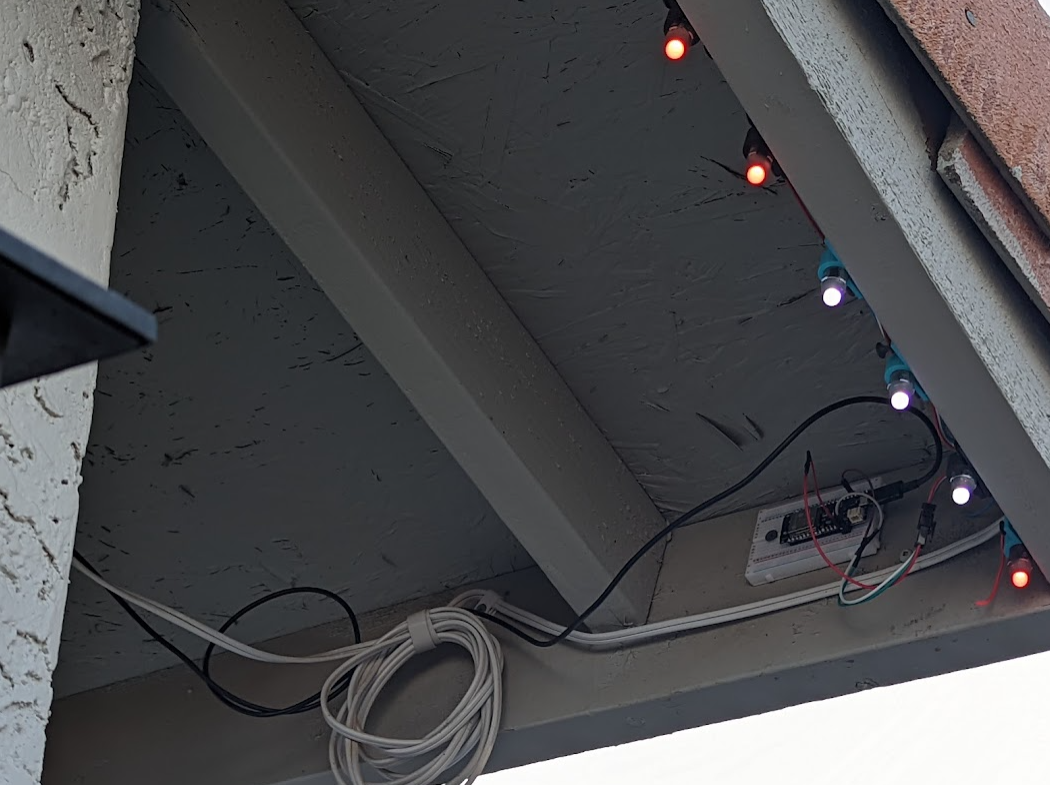
Having to place every LED and screw it in is a bit of a challenge in a few ways. For one, it takes longer than I have ever spent on Christmas lights before. It took over 2 hours for the first string of 50 (I only had 50 or so clips printed by then) and after those few hours on the ladder I was just kinda shaky so I had to stop anyway. But it worked! Here is the controller and a few LED’s. That white wire is for a camera . . . ignore that.
Not done yet! (new clip design)
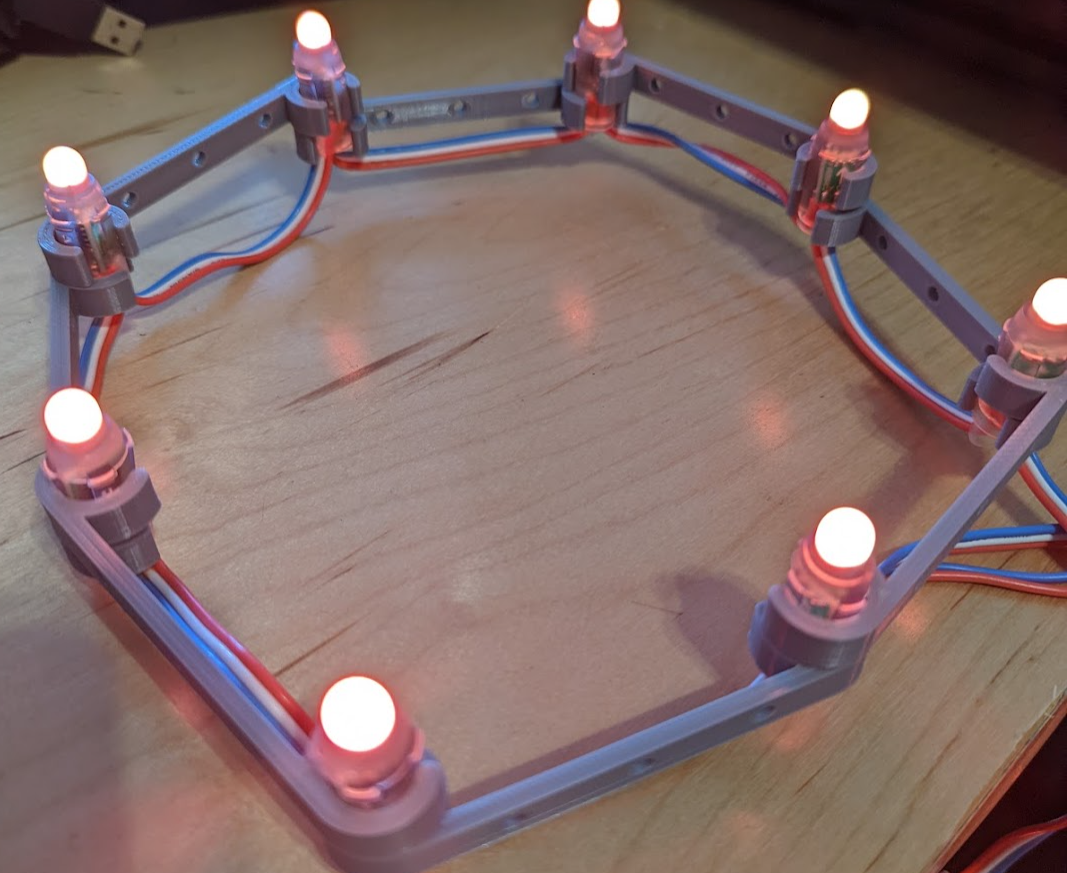
That was the first 50! I have 250 to go to cover the roof line. I did another 100 or so the next the next day and wired up the injected extra power needed for that many LED’s with the power adapter I mentioned above. After showing this to Jim he had all kinds of ideas but one of them stuck. This is what he said almost exactly:
How about instead of _o_ you try o___o?
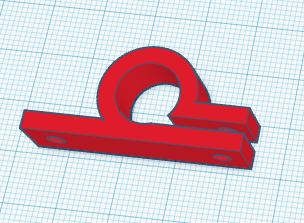
So that led me to my next design!
This one is a bit thinner (8mm instead of 10mm) so that I can use T50 staples (which are 10mm wide) to hold it down instead of screws. And as you can see it’s easier to feed in the LEDs. I did manage to break a few in my testing but it’s also possible to slide them on instead of pop them on so that’ll be my suggestion. I might also need to make them a bit thicker and the diameter of the inside of the C a bit smaller too. As a side effect, you can sorta make shapes by combining them.
I tried to staple them to a board as a test and it didn’t work the way I expected at all. The stapler has to be flat against the surface to work right and I was not able to put the staple across the 8mm width (you can see how far away the staple ends up on the upper left of the picture below). Instead I just put the staple right into the plastic and as long as I miss the holes I added as a screw backup plan it works fine. If the staple goes into the hole then the piece breaks or worse, it’s just wobbly and pivots on the other part of the staple.
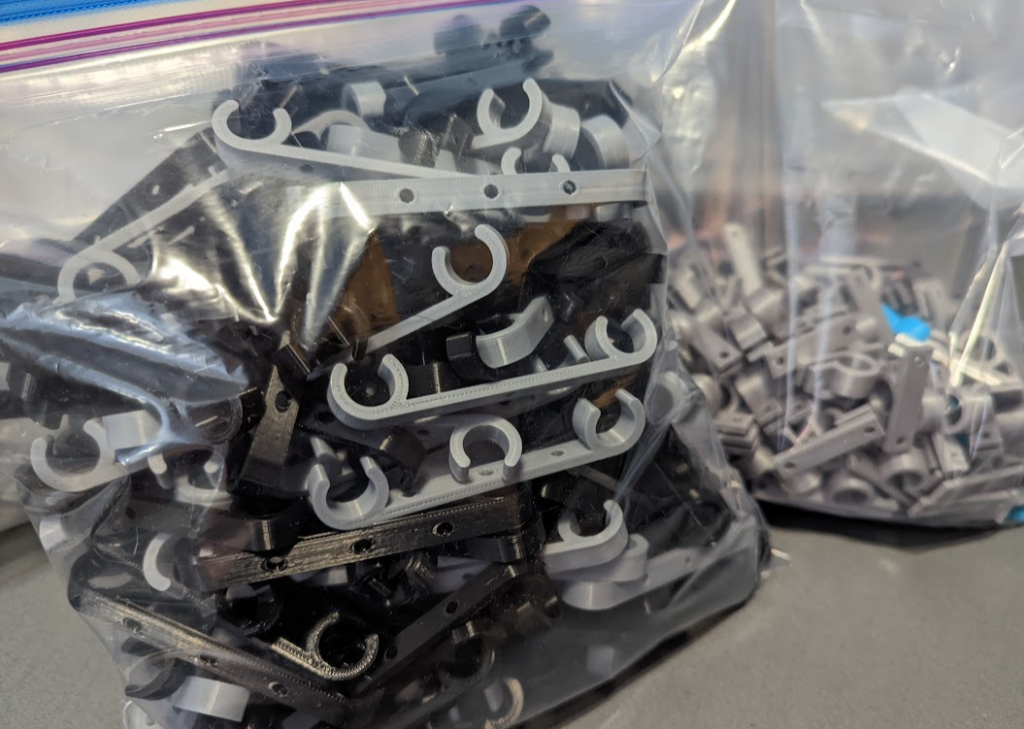
I need to think more about a better “staple friendly” design but for now these should work. They really really NEED to work since I have a 1 gallon ziplock bag full of them!
The future
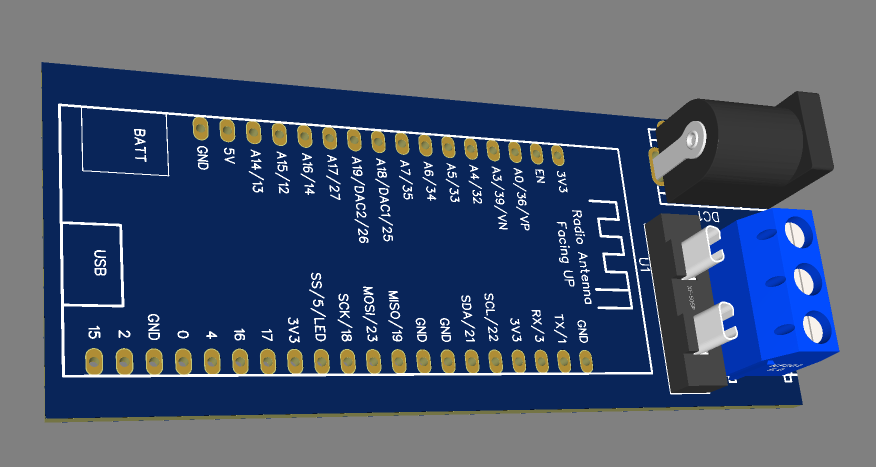
Okay, okay, so yeah, putting a breadboard in the eve of my roof isn’t going to last long especially with those tiny wires. There are a few good solutions I saw but I haven’t tried them because they are always out of stock! But many are cheap (like $30?) and have a esp32 included and have a custom board that has fuses and wire blocks that make hooking it up easy and safe. That said, I really like the idea of using what I already have and for now I’m going to 3D print a box. Next year it would be cool to design my own PCB and not need a breadboard or my previous favorite, just using a bunch of electrical tape to hold it all down. EasyEDA here I come! My guess is that for less than $30 I can make my own PCB (though it won’t be as good as the QuinLED-Dig-Uno).
I made SOME progress on that already but I need more time to make sure this will work.
Also, I have no idea how well the 3D printed clips are going to hold up. If they don’t hold up I’ll start sooner and print in either PETG or PC Blend (from Prusa). I really just need a set of 4 Prusa Mini’s for every type of filament!
FAQ
Why 5V instead of 12V?
Generally speaking the 12 volt LED’s will likely give you less trouble as you go beyond more than 100 LED’s but I really really like the idea that I can power the LED’s from the board if I have to. Also, from what I read the 12V ones tend to fail in more dramatic ways I would rather avoid (but that could also be more ambitions plans and have nothing to do with the voltages). For sure I have to inject voltage/power at the start and then about every 100 LED’s if I want to maintain the colors across the entire length of the run.
Why not print with better materials to start with?
As I mentioned, whenever I switch out materials I have issues with the printers! If I had more time I wouldn’t mind switching one but I needed 100s of them really fast! Plus, PLA might be fine! We’ll see. Can’t wait to see if them melt in the summer!
Why WLED?
It really was soooo easy. And while there are other options none seem to be as popular or as open.
What happens when I have 10 boards running WLED?
At some point you might want to do something that WLED can’t handle. The good news is that WLED supports all kinds of control protocols. It’s very common to use xLights to orchestrate many WLED controls. I’ll be attempting that as soon as I get all this installation done!
Products and links mentioned
None of these companies paid me to mention them (not that I would be opposed to that!) but all of them are helpful to make cool DIY LED projects.